
EDIT: I posted this on Cedars of Lebanon a while back, but I wanted to add it here so that it can be used. That blog will no longer exist after the end of April.
At long last! Here it is, Sue! It began once upon a time at lunch after church at ACAC. I think we must have been eating at Vincent’s in Greentree. Anyway, we were with the Kendricks and Gaudreaus, and Gabriela was at it again. Card sharking, I mean. (Well, not really, because she’s honest. But you’ve never seen a 10-year-old card enthusiast with such dealing ability!)
Amy remarked that with all of my sewing therapy, I should come up with some way to carry the deck of cards that always hitched a ride in Gabriela’s purse. She may leave home and forget her money or lip gloss, but she was never found without the capacity for a rousing game while awaiting appetizers.
I accepted Amy’s challenge and the Double-Decker Card Carrier was born:

After accommodating Gab’s cards for Spit, I decided that I should make a carrier for Progressive Rummy:

And one for Quiddler:

Sue has asked me to do a tutorial so that she may give these as gifts. I’m thrilled to have a reason to try my hand at a tutorial, never having done one before. How handy that I found this link, so that I’m not flying completely solo. Feel free to comment if you think I’ve left out any key points, or if anything isn’t quite clear.
Double-Decker Card Carrier
Materials:
10 1/2 inch x 4 1/2 inch piece of Backing fabric
10 1/2 inch x 4 1/2 inch piece of Lining fabric
(2) 4 1/2 inch squares of Pocket fabric
(2) 10 1/2 inch x 1 - 1 1/4 inch Tie fabric
Scissors
Pins
Iron/Ironing board
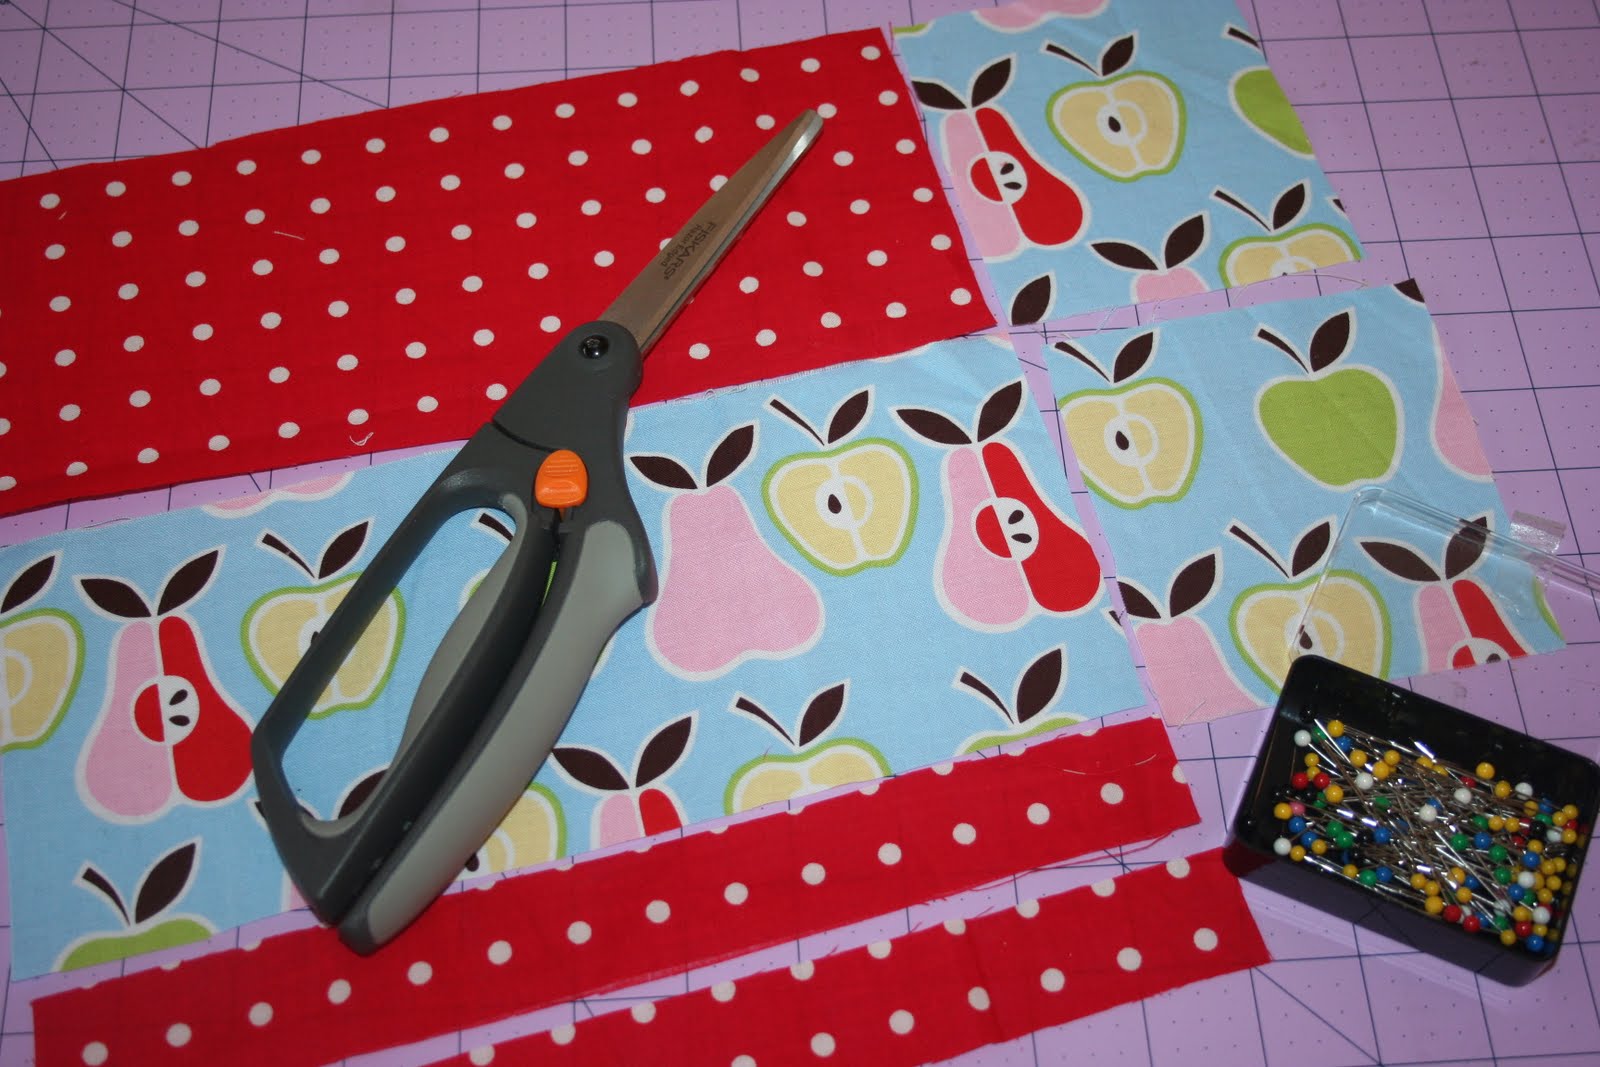
For the pocket, fold over at the top (approx. 1/4 inch), press and stitch. Fold (approx. 1/4 inch) sides and bottom of pocket; press. Fold pocket in half to find center, open, and fold tiny (approx. 1/4 inch) pleats toward center crease. Pin bottom of folds to hold in place. Repeat with second pocket.
Fold lining fabric in half to find center, as with the pocket. (Imagine each side as a separate rectangle.) Pin pocket in place, lengthwise, on each half of lining fabric, slightly fanning out the top of the pleat as you pin, and not centering the pocket exactly according to the center crease. The bottom of the pocket should be approximately 1 inch from the bottom raw edge of the lining, to allow room in the center later on for the carrier to fold with two decks inside, while still leaving a seam allowance at the bottom.


Stitch pockets in place. At this point, if you have a personalized tag you’d like to add, alongside the pocket, I’ve found, is a nice place to add it.


Next, place the backing fabric over pockets and lining, right sides together. Stitch around, leaving an opening at both ends for turning and inserting ties. Clip corners; turn right side out; shape corners; press.
NOTE: You can attach ONE tie on the inside, if you prefer, leaving just one end open for turning, but I leave both ends open and add the ties later.


For ties, fold one end over and the two long sides toward center, and then fold in half; press; stitch. Insert raw end of tie in each open end of carrier; pin in place. Topstitch all the way around, reinforcing at ties. (I’ve realized too late that I forgot to photograph the making of the ties. I remember thinking about it, but I must have become distracted.)


Behold and be pleased! (And it doesn’t hurt to knot the ends of the ties. I didn’t do it this time, but it isn’t too late.)


EDIT: Yikes! I almost forgot to ascribe credit to Penny -- quilter and all-around crafter extraordinaire -- for the tag idea. Not only is Penny a creative genius, she’s a hip, outdoorsy kind of gal, too!
What a fun idea. Thanks for sharing! Now I know what to do with card games whose boxes are beyond taping.
ReplyDeleteplease keep these tutorials coming! my speed skating daughter also sews, and we're trying to find a way to make a sewing machine fit in a NY apartment -- this will be such an inspiration to her!
ReplyDeleteYou know I love this tutorial! We recently got the game 'scrabble slap'...fun game! Now my little ones are into "Bananagrams"...these came with their own little pouch that looks like a banana. Yes, my fabric loving friend...keep the tutorials coming!
ReplyDelete